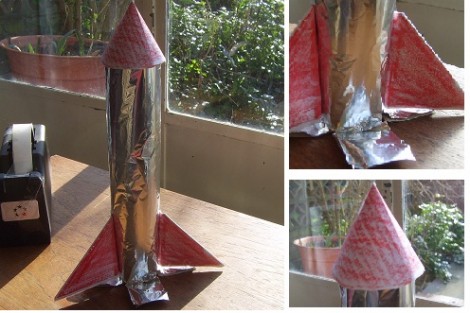
 What I like about this project the most is that you can either get all fancy, and use specially bought materials. Or you can just use what you've got lying about the house.
Here I've used items I had around the house but you can see how and where you can substitute these for other materials such as construction paper. Because this uses such simple materials, the project makes a fabulous spontaneous rainy day activity.
What you'll need:
- cardboard tube
- A4 paper
- foil
- scissors
- sticky tape
- crayons or paints
Now for the cardboard tube I normally use the inside from paper towels. However, I rarely use paper towels, prefering to use jay cloths (which can be washed and reused) instead. So I didn't have any to hand. Another possibility are the cardboard tubes from inside tin foil or cling film. However, following on from another project I didn't have any of those left either!
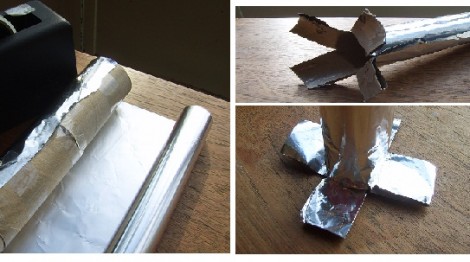
There's no reason not to use toilet roll tubes I guess. I'm probably just being squeamish. Plus, the tubes will be fully covered. So, first tape the three toilet roll tubes together.
 Next, wrap around the foil. I used wrapping foil from Sainsbury's (45p for 15 metres). Tape one side of it to the tube and wrap it around. Tape the foil down when you've cut off enough to cover the tube entirely. I put a bit of extra tape over the foil and into the tube at either end, to stick the two together.
Cut four slots, at equal distances and equal in length, around the bottom of the tube. Fold these outwards -these will make the 'stand' to keep the rocket upright.
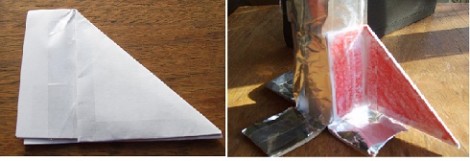
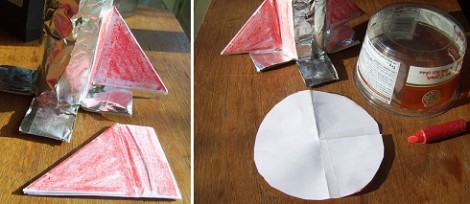
 Now take one of the A4 sheets of paper - for this I use scap paper that my other half bought home from work. Discarded sheets from a laser printer, which only have print on one side, are brilliant for the kids to use at home. Fold a sheet in half, then half again, and so on until it is about the same size as the one in the picture. Then fold over one corner to a point - again take a look at the picture for reference. At this point you can colour the paper in. Then tape up the edges where the paper is loose, and also tape down the folded edge. Fold the straight edge in, and tape this part to the rocket.
You will now have two fins at the bottom of your rocket. But it is still missing a nose.
 From another scrap of A4, draw out a circle. We used an old potato salad pot for this. Cut out the circle, and fold it in half, then in half again. Open it up - there should be a folded cross shape in the middle of the circle. Cut a slot along one of these folds, to the centre of the circle. Then, slip one half of the paper under the other, and slide together to make a cone shape.
Keep sliding it inwards, until the cone is the right size for your rocket. Tape the edges down to fix them in place.
Although you can just sit the cone on top of the rocket, it won't be very secure. You can either tape it down, or roll up some tape so that it is sticky on both sides, and place tabs of this around the lip of the tube. Push the cone firm down on the tape to secure it.
And you're done - one rocket ready to fly, in a child's imagination at any rate!


Comments