Valentine’s Day is coming! Yes, no sooner have we dusted ourselves off after the Christmas run and emerged victorious from piles of wrapping paper, than we have to contend with the (apparently) most romantic day of the year.
Well, instead of spending a fortune on goodies in the stores, why not start off your Valentine’s gift collection with some homemade bath bombs and a nifty idea to present them?
The Wrapping
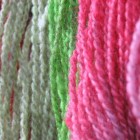 Sometimes a clever bit of packaging and wrapping can make something very small seem very big and beautiful. Take a preserve jar with a bit of room in it and place a cupcake or muffin liner over the top. Dye some string by leaving it for a couple of hours in Koolaid (seriously!) and use this to tie the muffin lids to the jars. When your bath bombs are done, just slip them into the jars along with some petals and your present is done!
Bath Bombs
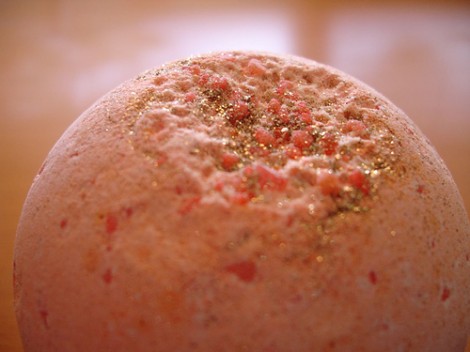
Don’t rush out and spend a fortune on bath bombs at fancy places – make your own. These are really easy to create and you can really have a lot of fun in the process. Be warned, though, they can be a bit temperamental so don’t be disheartened if your first attempt is a, ahem, bomb….
Ingredients:
- 227g Baking Soda/sodium bicarbonate
- 113g Citric Acid
- 113g Corn Starch
- 113g Mineral Salts
- 2tbsp Essential Oils (please make sure you use the ones for people, not for candles)
- ¾ tbsp water
- 2.5 tbsp oil – light vegetable oil
- Food colouring
Creation:
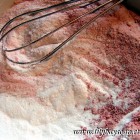 Mix your dry ingredients together until you feel they are really well blended and lump free. Try a pestle or a whisk if you have some lump issues. Take out a portion of the dry mixture and set it to one side – this is just in case you add too much water and need to dry the mixture out a bit.
Blend your oils, water and colouring in a jug with an easy pour spout, or use a spray bottle for better control. You’ll only need a few drops of food colouring to gain the right colour (it will look pretty vivid in the mix but will fade when blended) so stick with one or two to start.
Adding in the wet ingredients is something of an art. It’s here that things can get a bit tricky. The weather can actually affect how your bombs turn out, and how they react to the wet ingredients. I highly recommend using a spray bottle to gently squirt out small portions of liquid at a time.
Blend the ingredients slowly after each squirt and let the mixture absorb the fluids. The dry ingredients take some time to absorb the wet ones so you need to be patient. Use the back of a spoon to squish lumps of fluid out and get them to blend properly with the mixture.
 You know your mixture is perfect when you can squeeze it in your hand and it stays stuck – a bit like perfect building sand – but isn’t so wet that it sticks to your hand. If it is too dry it will crack or crumble, too wet and it will stick and melt. If you accidentally add too much fluid, just use your extra that you set aside to redress the balance.
Now you have to move fast. The moment your mixture is bonny and ready you have to get it into the moulds FAST. They can dry out and crack pretty quickly. Have your moulds ready to go and gently spoon the mixture into the one half, then slot it into the second half and press the two together. It takes a bit of practise so don’t give up! There are other tips and tricks for moulds on the web that you can try out if you don’t have any luck.
Another idea, the idea I use, is to simply use one half of a mould for cute and weird bombs that don’t have me wrestling with moulds for hours. This way is also more fun for kids as its easier for them to take part in the moulding process.
Hold your mould for about a minute, if that, and then gently tap out your bombs. If you don’t fancy spending money on expensive and styling moulds don’t worry, you can use ice cube trays, muffin trays, denture cases – anything. It is entirely up to you and your imagination.
Bath bomb warnings:
- If you add the water too fast the mixture will fizz. Slow down and add some dry stuff to calm things down
- Special moulds that cover the mixture completely may need longer to dry. Leave them for a while before trying to take them out
- Store them in an airtight container until you use them
- If the bombs crumble easily then pack your moulds tighter
- Cracks and splits may mean either too much or too little liquid – add some extra to see if it calms things down, or add in the dry mixture to dry things out. It is really about a very careful balancing act
- Initially stick with simple round and smooth moulds. Creating a bath bomb mould of the Eiffel Tower is just asking for trouble
- Tweak and tweak and tweak until your bombs stop cracking, they slip out of their moulds and they look amazing. It’s all about practise.
Once you have this recipe down pat, why not include items like oats, butter (shea etc), Dead Sea Salts, petals, milk, clay, sodium laureth sulphate (SLSA) and experimenting with your scents.
I have used this recipe for years and years and it took time to get the mix just right so have fun and enjoy some luxurious baths, I mean, presents…




Comments